How to Upload a Wordpress Site to Hostgator Ftp
There are several dissimilar ways to upload content to your WordPress, with the primary methods being the FTP, File Manager, or the WordPress Dashboard.
This article discusses the methods of uploading files through your WordPress Dashboard.
Please click the links beneath for more data.
- What file tin can be uploaded in WordPress? ⤵
- How to upload a file into WordPress ⤵
- The Media Library ⤵
- Related Articles ⤵
What file can exist uploaded in WordPress?
WordPress supports uploading of multiple file types, which includes but are not limited to the post-obit:
Images
- .gif (Graphics Interchange Format)
- .ico
- .jpg; .jpeg (Joints Photographic Experts Grouping)
- .png (Portable Graphics Format)
- .svg (Scalable Vector Graphic)
Audio
- .m4a
- .mp3
- .ogg
- .wav
Video
- .3gp (3GPP)
- .3g2 (3GPP2)
- .avi
- .mp4, .m4v (MPEG-4)
- .mpg
- .mov (QuickTime)
- .ogv (Ogg)
- .wmv (Windows Media Video)
Documents
- .physician, .docx (Microsoft Word Certificate)
- .odt (OpenDocument Text Document)
- .pdf (Portable Document Format; Adobe Acrobat)
- .ppt, .pptx, .pps, .ppsx (Microsoft PowerPoint Presentation)
- .psd (Adobe Photoshop Document)
- .xls, .xlsx (Microsoft Excel Certificate)
How to upload a file into WordPress
Files can be uploaded into the WordPress Dashboard by ii dissever ways.
Please click the links beneath for more than information.
- Direct upload into a page or mail ⤵
- Upload via Media Add together New screen ⤵
Direct upload into a page or postal service
I method of uploading files is directly into the page or post. If you lot have already started creating a page or post, you can upload a file using the WordPress block editor. Blocks are the smallest, about basic unit y'all'll utilize in the editor and tin can contain annihilation you'd want to include on a page or post - text, images, videos, audio, buttons, and custom code, to name a few examples.
To upload a file on a page or mail serviceusing the cake editor:
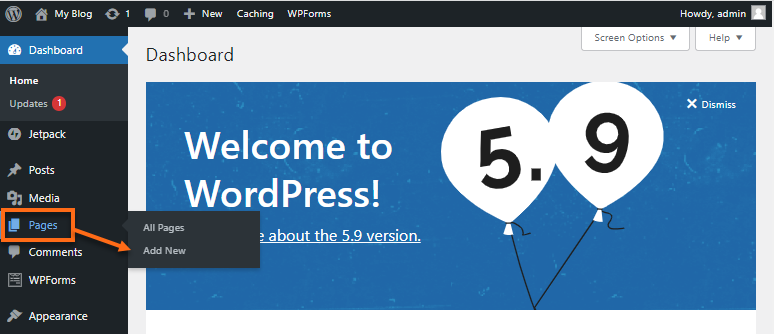
- On the Dashboard menu, selectPages and and so click Add New.
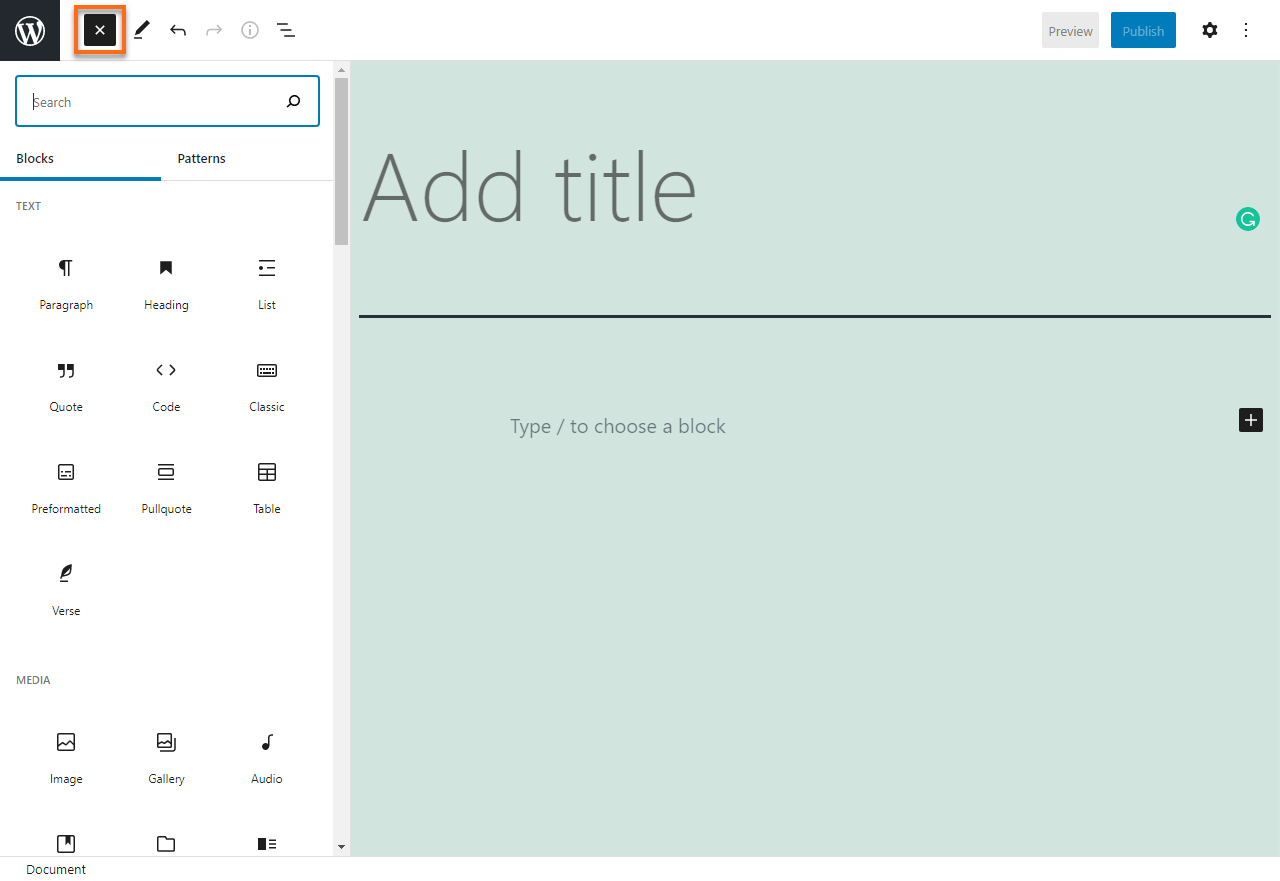
- On the new page, click the block inserter icon located at the superlative left or at the workspace expanse to add a block.
- Search for the file type y'all want to upload using the search menu. Y'all can also scroll through the categories until you find the Media department under the Block tab.
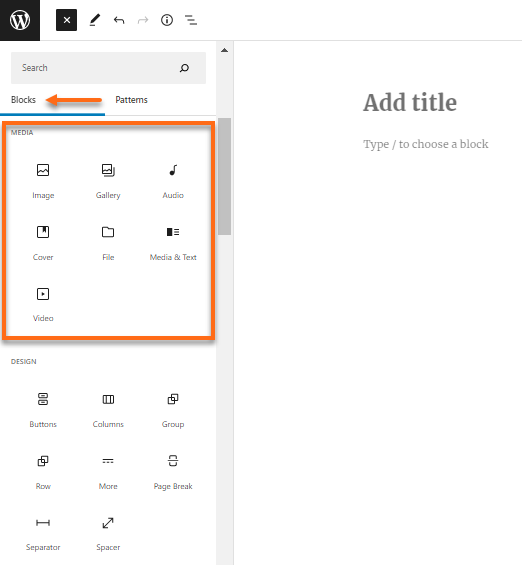
- Select the file type icon from the list (or search results) to add the media cake to the page's workspace area.
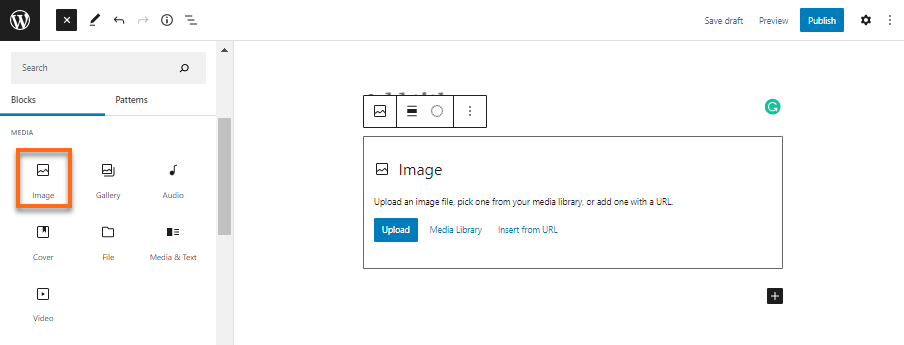
- On the media cake (for example, Paradigm block), click Upload to open a dialogue box, where you can select the file you want to upload.
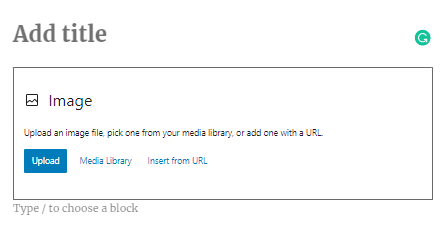
You may also use the Media Library if y'all accept already uploaded a media file to your WordPress Media Library beforehand. To know how to upload files directly to your Media Library, please go to Upload via Media Add New screen section below.
- The Image block should now display the uploaded image. Click the block to show the Paradigm cake settings.
- One time done, click theSalve the typhoon, Preview, or Publish buttons in the top-right section of the page or postal service.
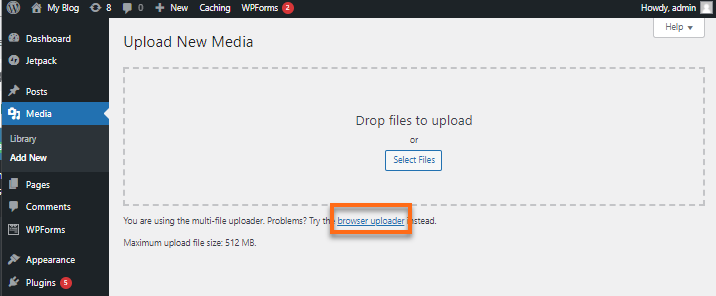
With the Media Add New screen, you tin upload single or bulk media files (image, video, audio, etc.) into the Media Library and apply them after on for your pages or posts. There are two methods for uploading files into the Media Library - the Multi-file uploader and the Browser uploader. The Multi-file uploader is the primary method, but you tin click the browser uploader link to upload your files if you lot're having issues using this.
To upload a media file(s) using the Multi-file uploader:
- Log in to your WordPress Dashboard.
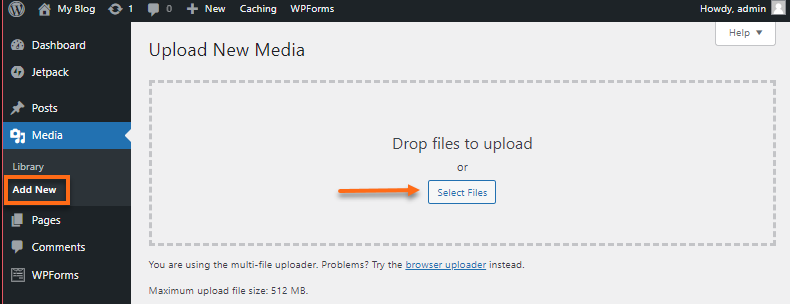
- Select Media from the left menu, then click Add New.

- In the Upload New Media section, click Select Files to open a dialog box where you can upload multiple files. You can also elevate and drop file(s) from your local figurer to the upload surface area.
Depending on your host'supload_max_filesize settings, the maximum file size you can upload varies. If y'all're on Shared hosting, y'all tin can upload up to 512M. For more data about your hosting's PHP settings, delight check the commodity, What is php.ini? Please notation that there are also PHP settings that cannot be changed, specially on Shared hosting plans.
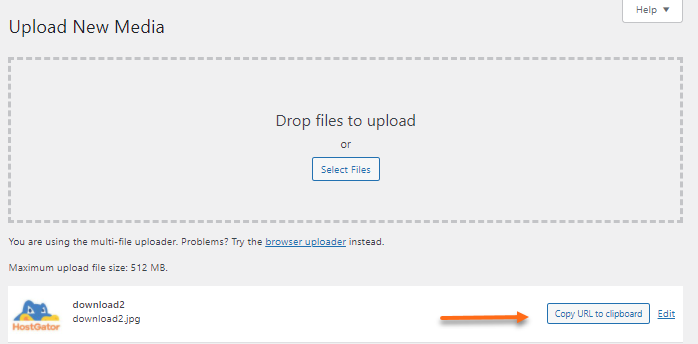
- A condition bar will be displayed adjacent to each file to signal the upload progress.
- One time completely uploaded, the file's thumbnail and details will be displayed. You tin click the Copy URL to clipboard to copy the file's URL or Edit to edit and salvage data about the uploaded file.
-
The file(s) are now stored in the Media Library section.
If you're experiencing problems uploading media files using the multi-file method, y'all can use the Browser Uploader instead.
To upload a file via the Browser Uploader :
- On the Upload New Media folio, click the Browser Uploader link.
- ClickChoose File to brandish a dialog box where you tin can select files to upload.
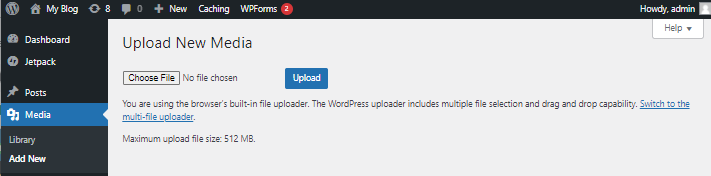
- Click on the Upload button to initiate the uploading process.
If the file does not open up, information technology is possible that the file blazon is not supported, the format may not friction match the file'southward true format, or the file was damaged.
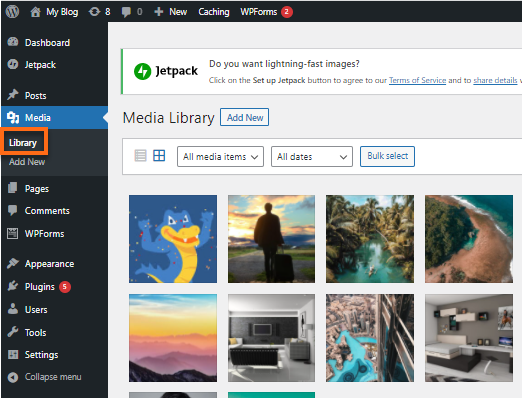
The Media Library is a collection of media files you've uploaded into your WordPress Dashboard. This is where you can search, filter, edit, view, and delete the media files previously uploaded to your site.
The Media Library has 2 types of view:
- Grid view ⤵
- List view ⤵
Grid View
With the Filigree view, all thumbnails of files are displayed in a filigree.
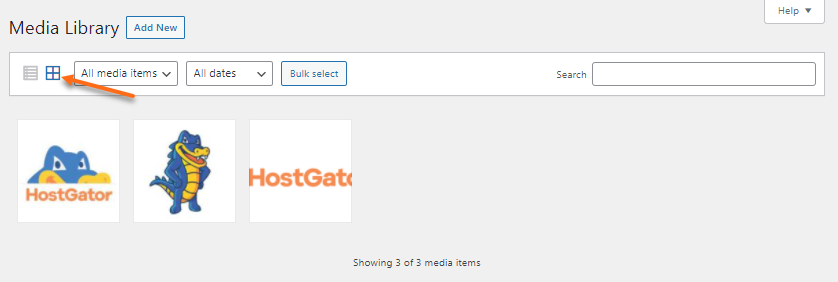
The Grid view allows y'all to search for your file using the search box on the correct. You can also use the filtering options:
- All media types - This filtering option shows all media files uploaded into your Media Library. You lot can also choose to filter by Images, Unattached and Mine.
- All dates - This option displays files based on their upload dates.
Click a file's thumbnail to show the attachment details. The Edit Media folio will allow you to preview your media file and make quick edits. The details seen in this section vary depending on the uploaded file type.
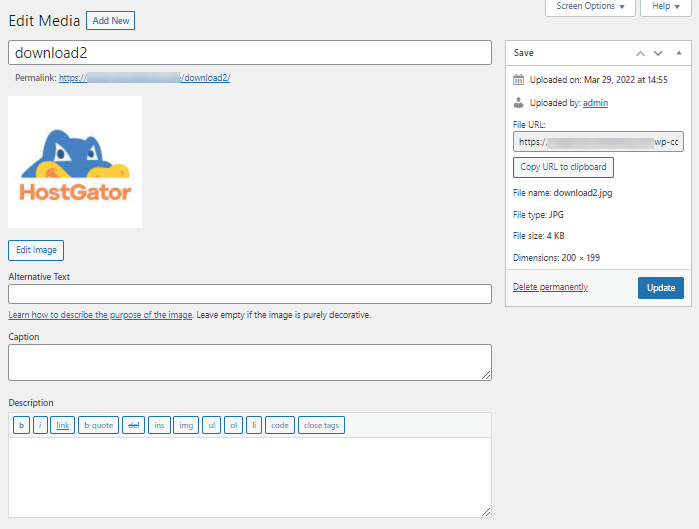
Hither are some of the details in the Edit Media section.
- Uploaded on - This shows the engagement when the file was uploaded.
- Uploaded by - This shows the author who uploaded the file.
- Uploaded to - This shows the folio or post's title that contains this particular media. This section is not displayed if the media file is non attached to any page or mail service.
- File URL - This is the uploaded file's read-only URL.
- File proper name - This displays the file's complete file name.
- File type - This shows the file's media type. (For example, JPG, PNG, etc.)
- File size - This is the size of the file.
- Dimensions - For images, this section displays the image file's dimensions.
- Alternative text - For images, the Alt Text section shows the text to depict the epitome file.
- Caption - Briefly explains the media file.
- Description - This provides an explanation of the detail media file.
- Artist - For voice files, this shows the media file's singer, composer, or producer.
- Album - For vox files, this shows the album title of the media file.
List View
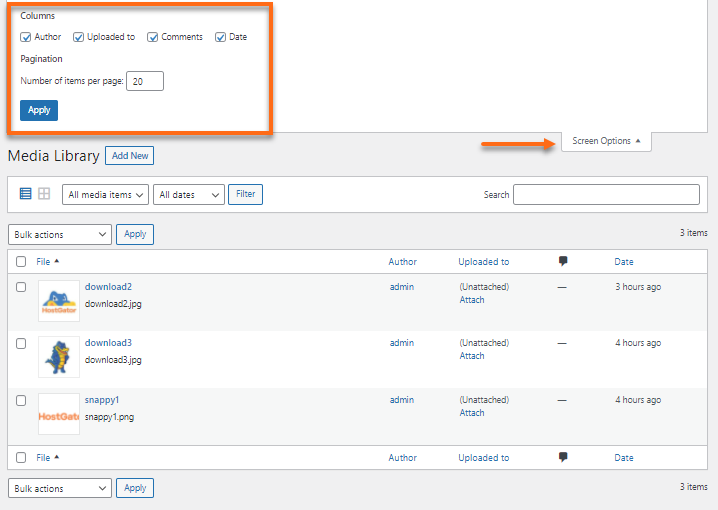
The List view displays your media files in a table with the newest uploaded file at the meridian.

The Screen Options located at the superlative right allows you to select the columns and number of items per folio y'all want to brandish on your list.
Hover over your media files to see the link menus beneath each file.
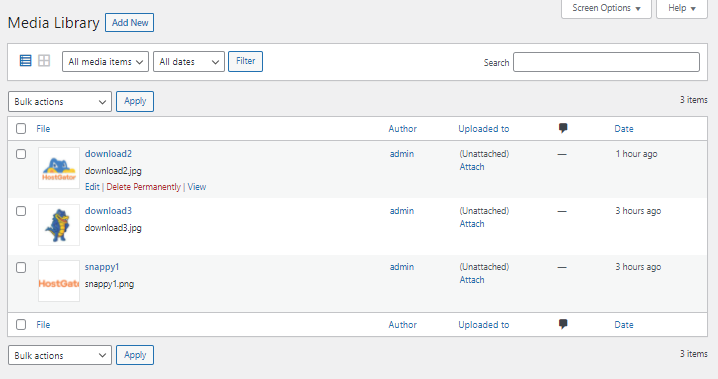
- Edit - This allows you lot to edit, such as rotate, calibration, and crop your media file.
- Delete Permanently - This deletes your file from your Media Library.
- View - This will show you how the image would look when displayed in your current theme.
- Attach - This link volition be displayed under the Uploaded to column for media files that are not nonetheless attached to a page or post. Click Adhere to attach the file to a selected folio or post.
With List view, you can search for your media file using the search box or use the filtering options:
- All - With this dropdown, all media file types are displayed. You can likewise choose to filter by Images, Unattached and Mine.
- All dates - - This option displays files based on their upload dates.
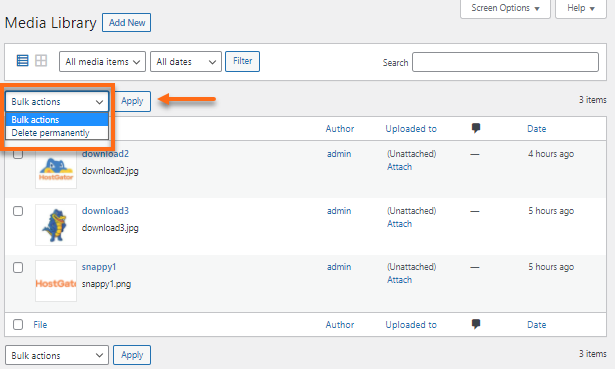
You lot can select Bulk Action or Delete Permanently from the dropdown and utilize them to selected files on the list by clicking the Apply button.
Hey! Creating a backup of your WordPress website, especially your media files, is important likewise! Yous can trust our professional service,CodeGuard, to create daily automatic backups of your WordPress site and notify yous when sketchy changes on the site are identified.
Related Manufactures
Want to learn more than about WordPress? Here are helpful articles to guide you with your WordPress journey.
- What is WordPress?
- Guide to WordPress Themes
- Guide to WordPress Block Editor
- Guide to WordPress Pages and Posts
- Guide to WordPress Plugins
- Guide to Publishing a WordPress Page or Post
Source: https://www.hostgator.com/help/article/uploading-files-via-the-wordpress-dashboard
0 Response to "How to Upload a Wordpress Site to Hostgator Ftp"
Post a Comment